
 |
 |
 |
 |
 |
You are not logged in. Would you like to login?

![]() Offline
Offline

It's time for removal and I have lots to remove. The trailing arm mount, shock mount, bump stop and IRS cross member mount. I'm thinking of using my 4 1/2" grinder as a cut off wheel. Does anyone know which wheels are the best?
Day you once asked me what I was going to use for bump stops. Coil-over setups have a bump stop built in. Just a rubber that fits onto the shock shaft.
Last edited by Ralphy (9/06/2011 3:45 am)
![]() Offline
Offline

Ralphy, I buy 6" zip blades at Fastenal, they have several brands and I usually get the cheapest ones, around 3 something apeace. Last a lot longer than the 4-1/2" ones and work better too. If you have to remove the guard be really careful. They'll cut right through flesh in a flash. BTDT, stitches are not fun and it heals very slowly.
JB
![]() Offline
Offline

I get my 4" units from harbor freight. The work well and last a long time. For the longest time I used my chop saw and my die grinder with a cut off wheel as my primary cutting tools. Then I picked up some wheels for my angle grinder and I will never go back. I cut most things with the angle grinder now.
![]() Offline
Offline

I keep 4 of those $20 grinders on the bench and use all of them quite often. Even still have to change attachments sometimes. I really have to make a bigger rack. They've gone up though, $29 for one of them. It may be better, it may not. It's a good chunk out of the tool budget (as if there ever was one) but pays off, as the work is divided up between them and they all last longer. The usage is the same and replacement cost about the same, but you're only down a grinder or two at any one time, not at a standstill. There's a lot to like about that system.
JB
![]() Offline
Offline

I thought about using a torch, however if a grinder works I can have a little more control of where the heat is going. That 6 1/2" idea sounds like a winner Jim.
Thanks Guys,
Ralphy
![]() Offline
Offline

Well two 6" wheels and two 41/2" wheels and I removed the bump stop, shock mount and most of the trailing arm mount. I had some scary moments, don't let these wheels bounce, wheels can get trashed easily.
![]() Offline
Offline

I need a wheel that will remove material at a higher rate. Going to try one of these.
Just tried the new wheel, much faster removing welds and metal. Ceramic wheels are the bomb! I should end up with app. 20 lbs. of weight removed per side. Cobras going on a diet!
Last edited by Ralphy (9/08/2011 8:58 am)
![]() Offline
Offline

I was surprised the regular cutting wheel was not fast enough, because it it has been my experience that they go through steel like butter, BUT since you say the ceramic disc is much better I am thing I may have to go get one ![]()

![]() Offline
Offline

Using the side of the .045 wheel was great. But removing the remainder? This ceramic doesn't even blue the metal, cuts faster!
Fastenal has very little stock, you would probably have to order them. I was lucky they had this size.
High performance
Ceramic aluminum oxide grain
Very uniform,high density grain structure is extremely durable for long life and cooler cut
Combines fast stock removal w/long life
Last edited by Ralphy (9/08/2011 9:20 am)
![]() Offline
Offline

Doesn't blue the metal? Sounds like a high recommendation, how about right at the edge? I noticed it's twice as thick so maybe not as precise, but a fast clean cut is worth a lot. How did the burrs compare?
JB
![]() Offline
Offline

Jim, I'm not sure where your going? I'm using the face of this wheel not the OD to remove the remainder of the weld and brackets to blend smooth. The thickness of the wheel is not a concern, in fact they make thicker yet wheels. This is the only one my location had, it's rated at 60 grit so it's pretty course.
I have used ceramics in the machine industry. I could and did cut 58 rockwell metal. Spun at 1,000 plus RPM and a feed rate of .001. A glowing orange chip came of, so light it would trail up 1 foot glowing. Then I could hold my hand out and catch the continous stringer in my hand and not evena little burn. Because it was so thin it cooled in maybe 2 seconds. The only thing about a ceramic insert is it will not tolerate itermintent cuts, they fracture. By the way 58 rockwell is bearing hard and that is what I was cutting, ball nut bearings. You can get about an 8 micro also.
Can't do this with carbide!
What's amazing about this video is that they are machining inconel. It's a form of stainless. It contains about 70% nickel, it generates a lot of heat when cut. That chip is red hot but the part is probably not. I am machining inconel right now as I type. I rebuild jet engine combustion chambers. I'm working a 2037 motor for a 757.
This is funny, here's someone drilling inconel with a HSS drill. That drill will probably be trashed when he finishes one hole.
Anyhow my point is ceramics are pretty neat!
Last edited by Ralphy (9/09/2011 6:21 pm)
![]() Offline
Offline

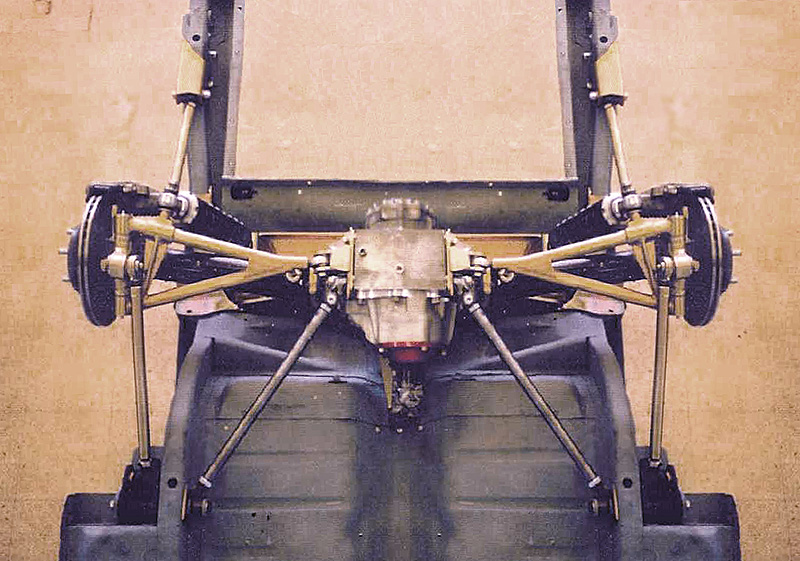
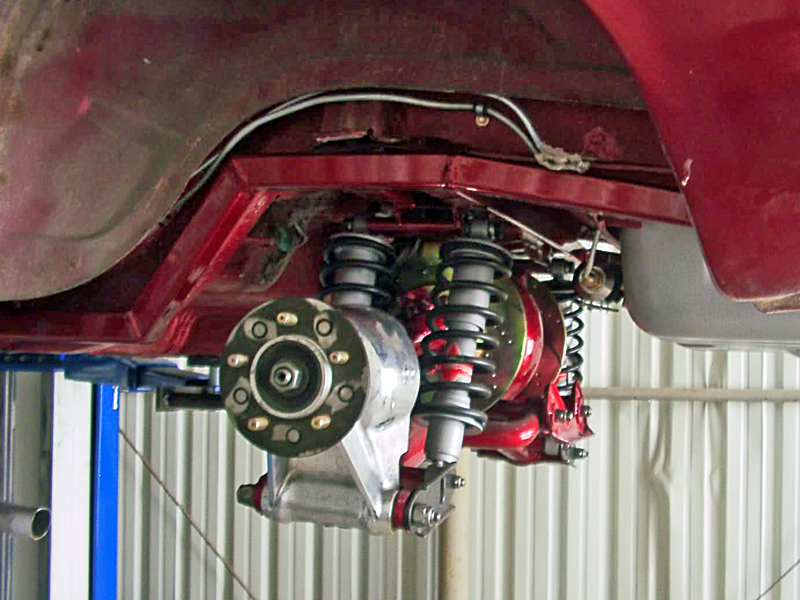
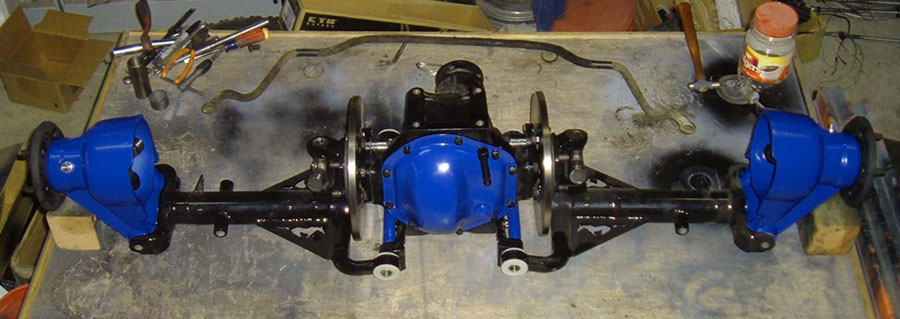
Holy smoke, I just killed my grinder! Figure I have approximately 100 plus inches to do. I'm almost done on the drivers side, one little corner I'm having trouble with to reach. I am for sure replacing the diff cover with an aluminum one and building my own rear mount. I'm going to weld a 2" tube between the 4" dia. frame. Then make an elongated triangle mount and make half shell clamps that I will bolt in. I will be able to move the housing if ever needed. Plus I may add an upper link taking the load off the half-shaft. I will be able to mount the upper link to the 2" cross tube for the diff mounting. I will position the tube directly over the half-shafts. I also now understand why racers mount their springs to the front of the half-shaft. When cornering you get chassis flex, further to center equals less flex movement. Right now I am looking to do the watts idea with the coilover to the rear.
,3803.html
Last edited by Ralphy (9/13/2011 12:37 pm)
![]() Offline
Offline

Couple of picks of what I have gotten done.
!oZZ1QQcurrentZZhttp%3A%2F%2Fs587.photobucket.com%2Falbums%2Fss311%2FWilly12_2009%2F%3Faction%3Dview%26current%3DIMG_1227.jpg
Where it started!
Looking at something like this.
Last edited by Ralphy (9/13/2011 6:57 pm)
![]() Offline
Offline

Ralphy wrote:
Couple of picks of what I have gotten done.
Where it started!
Looking at something like this.
The whole thing is looking good. You probably just burned up the brushes in your grinder. if they can be replaced it should be an easy fix.

![]() Offline
Offline

Ceramics take a pretty rigid setup so they aren't too common in general machining work, but great when you need them. My earlier comment referred to slicing wheels and I naturally thought that was what you were doing. Might have to look for one of those though, it seems you've discovered something useful.
At one time I was using diamond tools, making prototype lenses for cataract surgery. That was a long time ago. Air bearing spindles and all kinds of fancy stuff. Now THERE's a tool that won't tolerate any abuse. I think I still have one or two of them in my tool chest.
JB
![]() Offline
Offline

Jim,
I have since posting realized I was using the Porter Cable wheel, it's trash. The wheels Lowes carries are much better. But today I used the ceramic wheel for slicing and it resists breaking better than the the wheels I picked up at Lowes. Another problem I have is getting the wheels off especially the larger diameter, they lock up tight will try a little grease.
Day I worked the hell outta that poor thing!
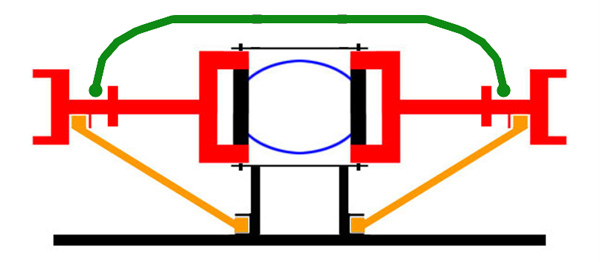
The Vette crossmember will go and the brake lines will be more conspicuous. If you follow the arrow up in front of the jackstand, you can see the remainder I am having trouble getting to. the first time I had thought about a watts setup, was when I saw a Cobra guy setting up his solid axle just the same. I asked him if he thought it would work with a IRS. He said I guess it would. Then I started noticing your pics Day of the Klaus Arning. I kept asking which way the toe would work best ,in or out. Because I knew some toe will happen regardless. As far as roll/steer I'm staying away from that as much as possible. I have looked real hard at Duanes pics and another guys video of Duane's setup. It appears they are adjusting the toe steer out, based on how flat the camber rod points are located. Mind you, I figure the front mount has to be higher than the rear at zero roll/steer. Because the watts moves the hub back under jounce, this would cause the wheels to toe out if the front rear mount points were even.
Here's the video T5 app. at 1:20 minute
Last edited by Ralphy (9/13/2011 10:02 pm)
![]() Offline
Offline

This is brutal, can't wait till I'm finished with the removal. I started on the cross member mounts. These guys welded this car well. The two best wheels so far are the ceramic and the XP, DeWalt wheel at Lowe's. Picked up a couple of 4.5 wheels at the local Fastnel store, Meh! Wish they had more ceramics.
Last edited by Ralphy (9/19/2011 6:32 pm)
![]() Offline
Offline

Well I got my aluminum differential cover from Speedway Motors last week. It's pretty stout, the gasket flange is much thicker than the cast steel. I spent a bit of time removing cast lines then bead blasted. Also because of the thickness, there is not a flat surface around the bolt head area. So I will still need to spot face these areas. hex head bolts are probably to large in diameter, so socket heads are needed. Being that these bolts are 7/16" dia., no problem. I'm also working on my steering system, complete rebuild, Flaming River rack and tilt column, new universals and shafting. I'm making new supports for the column. The original had wood spacers!
On the left side piece, it is nothing more than a spacer gone wild. Free time and the desire to see how light I could make it. The right piece is in process, foot box/firewall steering shaft support will get an oil light bushing when done.
Last edited by Ralphy (9/26/2011 7:05 am)
![]() Offline
Offline

Hey Guys!
Been workin me azz off! I put in a lot of machine time redoing my steering. I'm making my own Double D stainless shaft, new rack, new column, new universals, etc... The interior looks sharp with the polished aluminum hub and naked stainless column. Today I started back on the IRS. Just finished fitting the cross tube that will support the carrier. Next I fire up the welder for the first time. Oh, that big old Vette crossmember is gone. ![]()
I'm also working in my head, my brake clutch mod. I am going to move the pedal assy. under the car.
Last edited by Ralphy (10/03/2011 1:06 pm)
![]() Offline
Offline

so exactly which parts are you using from the Jag rear and from where are you getting the other pre-maid parts ( I understand this build will require A LOT of custom fabricated parts)

![]() Offline
Offline

No Jag parts. Building my own hubs, trailing, toe and camber links. Right now I'm liking the C4 layout with coilovers. I like the rigid setup with the link behind the halfshaft. My halfshafts are 12" long, the links will be a minimum 13" long.
Last edited by Ralphy (10/03/2011 10:18 pm)
![]() Offline
Offline

Well silly me! I went out and bought a Lincoln MIG 100 welder, 110V. NOT WORKING NEED MORE AMPS! So now I am looking to upgrade. I have seen a Lincoln 180, 220V. I figure it will do, any suggestions? I am trying to get it done with 20 amp service, I figure off a clothes drier outlet. The Lincoln 100 I bought a while back with little insight. Has anyone used a flux core welder, is argon better?
![]() Offline
Offline

I have a 110 volt Lincoln, and I have used it to all the welding for my jag project. I would never use it for more than 1/4" thick material and I bevel any tim I can to improve penetration but as a hole I am very happy with it. You need to ditch the flux core and go to the argon/CO2 mix. Buying the upgrade kit for my lincoln was the best thing I ever did. My welds went from fairly good to fantastic just by going to gas.

![]() Offline
Offline

So stay away from flux core. I do have argon mix, I have the SP 100 rated at 90 Amps. Seems to just not pour enough heat into the metal. I see a max rating of 12 gauge steel, .105. I have .125 steel, I am having the weld sit on top like a caterpillar. I'm guessing you have the 140?
Last edited by Ralphy (10/06/2011 7:20 am)
![]() Offline
Offline

couple things, usually if you are using gas than you run wire that is not flux core. I have heard of people doing both but for most things you run solid wire with gas and flux core with out. What diameter wire are you running?? I recommend .035 it will allow you to turn the wire speed down and really put some heat in to what you are welding. also how much welding experience do you have???

![]() Offline
Offline

I'm using .03 wire, and I have tried slowing the feed. It helped some, however I can see very little heat in the metal. It's been awhile but I ran a mig as a job. What unit do you have?
Also I do not have a flux core setup, I was only asking Day. Seems some are promoting it. I'm doubting the quality.
Last edited by Ralphy (10/06/2011 8:52 am)
![]() Offline
Offline

I have the weld pak 100 similar to the one pictured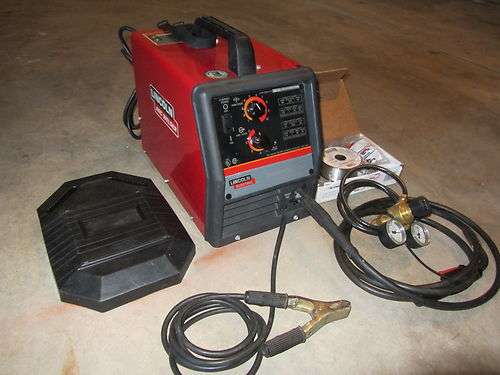
its an older unit but works very well. I too am running the .03 wire not the .035 I mentioned earlier. I have my wire feed set up to the slowest setting I can have it out and still have the wire constantly feed. I get fantastic penetration on 1/8" and like I said before if I bevel things or weld to a corner can push it to 1/4"

![]() Offline
Offline

Wow! I never ran the wire that slow. I'll try it out. I know a guy who says he pre-heats the metal with his torch on thicker metal.
![]() Offline
Offline

yep that is an old school trick I have heard from old timers to extend the range. Makes sense I recently welded some legs on a 1/4 plate for my brother and I only got heat marks on the back side of the plat on the last 3/8" on a 3" long weld. Took tat long to get enough heat in to the metal to get good penetration but a torch would have been a good way to get some preheat. When I say the slowest setting I don't mean the slowest setting the welder is capable of but the slowest setting I can put it at where the wire doesn't melt up the wire while you are using it. My speeds go from 1-10 and I weld most of time with it on 3

![]() Offline
Offline

What heat? I was at about 3.