
 |
 |
 |
 |
 |
You are not logged in. Would you like to login?

![]() Offline
Offline
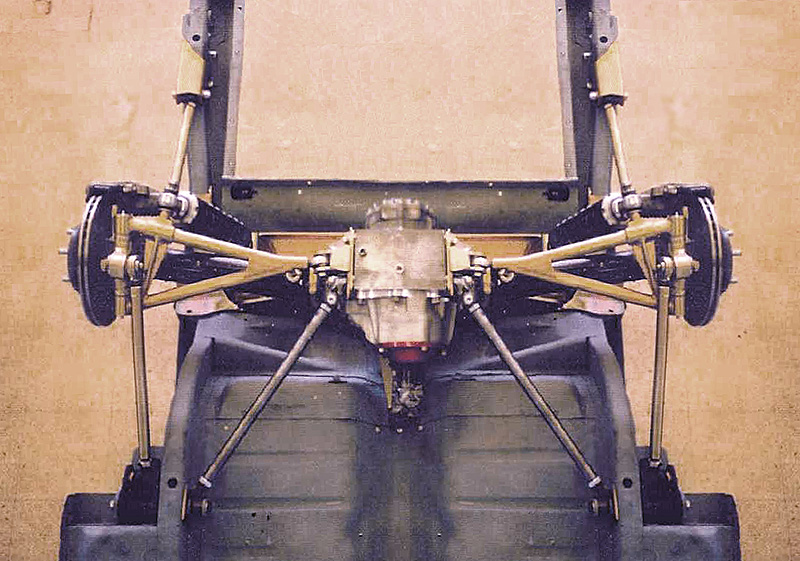
Hello all. I am a newbie to this forum and as well to Hot Rod building. However I have many years and completed several British sports cars from ground up as well as minor restos. I am tired of them so a while back bought a 30 Model A project that someone had started. He did a few nice things but many, many mistakes made which I will attempt to repair and not duplicate. One of the goofs in my opinion is putting a GM straight axle with 4 links and coil overs up into the body of the shell. This car is a 2 door sedan and I want the back seat and I had two big ugly improperly installed coil over shocks and mounting frame there, hence the Jag rear end. Being involved in Brit cars in Orlando area I easily found a complete XJ6 diff with 288 gears in the cage. Now my next step is to educate myself on the proper way to install this diff in rod frame which is powered by a Vette 5.7 .
I would love to have suggestions on a good documented installation, perhaps a "how not to book"...wait I better look for a "how to" book as I probably already know a lot ofways how not to.
BTW "Frankenford" ModelA, mustang II front end, Corvette engine, GM Tranny, Jag rear end. All I need is electrodes installed in the neck.[b][/b]
![]() Offline
Offline
Nice handle, welcome to forum. Hopefully you have pics of the mistakes and can do a before and after.
Good luck!
![]() Offline
Offline
Have you checked out "The Jaguar IRS picture thread"? The link is at the top of the forum section list.
Though not a how-to guide, there are a lot of great ideas in this thread. On your first pass, the pictures will get your brain churning. On the second pass, you'll start to read the posts in between the pictures and it goes to a whole new level.
While I'm still very new here, it seems like a lot of guys ditch the Jaguar cage and build their own cage out of steel pipe. It seems like it would be less work to just mount the whole cage in the car, but I am sure these guys have their reasons. For instance, I have an old Jaguar with a seized rear caliper. I tried changing the caliper with the cage in the car yesterday - wow, it's almost impossible! I will probably drop the whole cage next week and do both calipers, all bushings, clean it, etc. That seems like one good reason to ditch the stock cage - if my car had one of those tubular cages instead of the sheet metal cage, I might actually be able to work on the brakes!
A lot of what you do is going to depend on your fabrication skills, budget, personal preference, desired results, etc.
![]() Offline
Offline
I tried to upload some photos and after all that work with the captions I get the message I have to had posted two messages before I could do that.
Grr....
oh well will try again later
![]() Offline
Offline


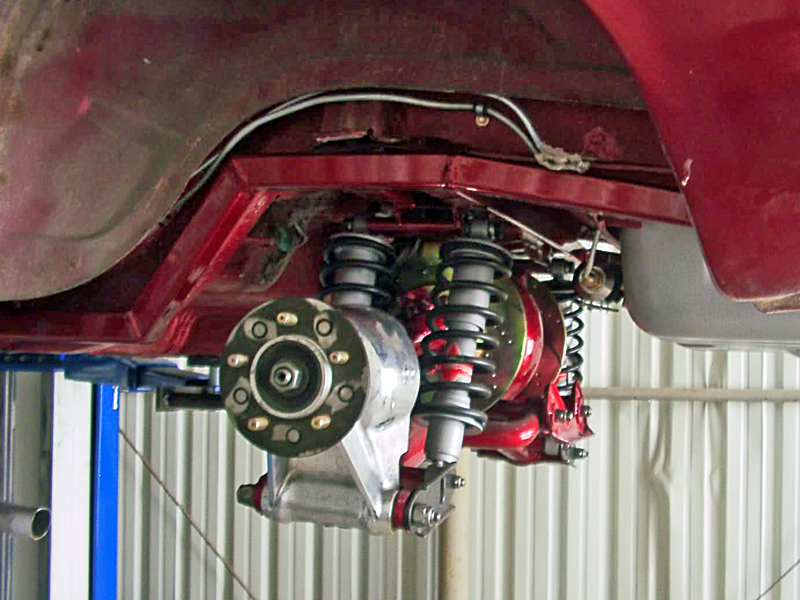
3rd time trying to post photos. They seem to be posting in reverse order of the way I uploaded them. It would be too easy to just slide the whole caged Jag rear end under the frame and weld it into place. After cleaning and rebuilding it of course. But a 5.7 in front might be too much for it.
The Mustang II front end was too wide for the frame he built so he just cut some of the old Mustang frame and welded it to the new one. Looks pretty crappy to me. Also no rubber motor mounts nor is the rear of the tranny mounted in rubber. With the original wheels on the front (13s) the oil pan had 2 inches road clearance and the headers were even lower. Had fun rolling it up on the trailer.
![]() Offline
Offline
Cool project! It looks like they meant well with the rear suspension, but I don't think it turned out too well. The IRS looks much better.
I don't think you'll break anything with a 5.7. On one of the Jaguar forums, there is a guy road racing an old XJ with a twin-turbo big block. I believe his rear end components are stock, except that he replaced the forward trailing arms with a rigid setup that tracks properly with the wheels, and does not push the wheels out when the wheels go down... not sure exactly what it's called, but there are bunch of them in that pics thread.
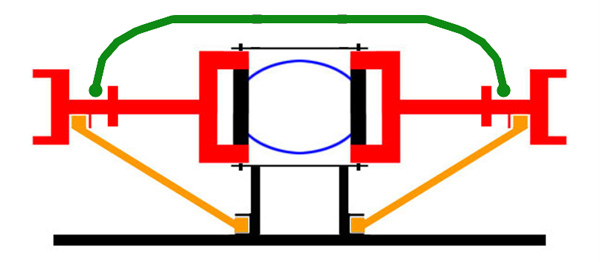
Also, you probably noticed that the rear and doesn't really have any bushings - I am pretty sure the lower control arms are needle bearings, and the upper control arms (axles) are U-joints. To isolate vibrations and noise, the Jaguar cage used rubber mounts to mount the cage to the chassis.
![]() Offline
Offline
Yes I saw the needle bearings when I took the cage off the diff. I haven't pulled the stub axles yet as I am done for the day. I think the appearance of the uncaged Jag IRS looks so much better under a street rod.
This is going to be a long project I know but then I just finished a 2 year one so a little bit most every day will get it finished.
![]() Offline
Offline

Hey Frankie!
Welcome aboard, first thing that comes to mind is a Aussie guide to a proper swap. It's been posted here somewhere. They have government guidelines over there and I believe it details a Jag IRS. I'll give a search.
By the way your missing some important parts to your front LCA's. I don't see the strut rods!
Ralphy
Not bad 10 minutes and I got it. It's a pdf file on how to build a street rod. I added this as well as Phantomjocks, Bits and Pieces - COMPONENTS for your Build to the video library.
Last edited by Ralphy (6/22/2012 5:55 pm)
![]() Offline
Offline
Thanks Ralphy for that information. Some good photos on that Australian site. Yes I know the LCA's are missing and should be able to find some locally or fab them if I have to. I saw there is a supplier for aftermarket ones.
The original setup came with 4 links and I am going to see if there is any way to use them but am afraid not since they are mounted straight down the outside of the frame.
I have pretty much decided that I am going to have to split the cross members and widen the frame. That will allow me to mount the Mustang II front suspension directly to the frame and adjust it for camber and also have room to put in proper engine mounts.
Looks like I better stock up on sawsall metal cutting blades!!! I don't have a plasma cutter.
![]() Offline
Offline

Nice project!!! Thanks for posting and welcome to the forum. A welcome to FastKat as well.

![]() Offline
Offline
Here is the link - hope it helps
![]() Offline
Offline
Thanks for posting that link. I just got home yesterday from picking up the new frame I had made for me up in North Carolina. I will be posting some photos of the frame inclucing the JAG IRS crossmember that the builder made. I can't say enough about the quality of the engineering and fabrication of this frame but I will let you guys decide when I get the photos posted.
![]() Offline
Offline


Well a couple of things and a few photos of the IRS being installed on the new frame. I did break down and bought a plasma cutter, US made one that local people will service if needed. I dont' have all the poly bushings yet to mount the diff to the crossmember so is just supported temporarily. I was told that this diff was from an 84 or 85 XJ6 and there is a plate for the ratio showing 288 which is exactly what I wanted in what I hope will be a highway cruiser.
The inboard bushings for the LCA are missing and several spacers as well but I don't have a legible exploded view of all the parts. SO...
Does anyone have a recommendation for a supplier who will have a good list of the seals, spacers and bushings etc I will need to finish the install? There is no way I am going to the Orlando Jag dealer !!
I may need Ujoints on the half shafts as well if I can't extract the broken Zerk fittins. I also have all 4 of the shocks and springs but don't really know the condition of them and they aren't very pretty even if still good. Another item to buy as well as I know I will need to rebuild the calipers. So again any suggestions for suppliers.
After I position and weld the engine mounts and have the location for the transmission mount I will either fab a pair of radius arms or see if someone like perhaps SnowWhite has them to my specs.
More later of course
![]() Offline
Offline
Napa got the inner LCA bearings and we came up with some seals. I have priced out the calipers thru them also, 87$ for a rebuilt and 12$ for the kit. U-joints thru them also. Sorry I dont have part#s here handy. One thing I havent come up with are the bushings between the LCA shaft and the bearings. Most of this is pretty common sized stuff that I have run into so making some of it isnt out of the question. It appears the inner setup is one thing I havent taken a pic of. I ran into issues trying to deal with a jag dealer here. Without a Vin off the car they wouldnt talk to me. "Well it might be stolen" Complete rusted /used XJs in these parts are cheap, You would have to be desperate to bother stealing one...
![]() Offline
Offline
I got all my parts from sng barratt. Fast shipping and if you have any questions they answered them without issue.
What bushing are you talking about? I do not remember a bushing when I was rebuilding mine.
![]() Offline
Offline
Another question for you, what transmission are you going to be running? I have a 700r4 with lockup that I was running in front of those 2.88's and they were way to tall for the car. Running at 100kph (65mph) and it was pretty much idling down the road.
Made for a real pig if you wanted to pass anything. I swapped it out for 3.54 and now its happy.
![]() Offline
Offline
Frankenford, you might want to double check your rear end ratio. Mine has a tag for 3.31 gears but the input turns three and a half time before the hubs have a complete revolution. After I opened the diff cover, I saw the ratio on the ring gear was 3.54:1. Also, Kugel Komponents used to make/sell high density poly urethane bushings to replace the bearings on the control arms. There might be some other companies as well. Just letting you know you have options.
![]() Offline
Offline
303Radar wrote:
Frankenford, you might want to double check your rear end ratio. Mine has a tag for 3.31 gears but the input turns three and a half time before the hubs have a complete revolution. After I opened the diff cover, I saw the ratio on the ring gear was 3.54:1. Also, Kugel Komponents used to make/sell high density poly urethane bushings to replace the bearings on the control arms. There might be some other companies as well. Just letting you know you have options.
Why does anyone want to take out the bearings on the control arms? They're a much more positive locating element than any sort of bushing would be, and that's a horrible, horrible place for polyurethane in any case. There's a whole lot of applications for which the aftermarket sells urethane bits for which they're not at all suited - anything involving rotational motion, in particular.
I'm thinking, though, since I've got access to the CNC mill now, that I might as well go ahead and make a better mold for my urethane '64 Galaxie body mounts and maybe start selling 'em if I can figure out a proper way to vacuum degas them while they're curing, the set I made for my car had a 50% scrappage rate 'cause my de-gassing wasn't very good.
Last edited by JEM (9/06/2012 5:47 pm)
![]() Offline
Offline
The bushing/race? I mentioned was what the needle bearings seated on instead of the actual shaft. Keep in mind this particular RA was Frankensteined together somewhat , so what I have may not be the normal OS. If there is a better bearing setup that would replace these I'd be a more Happy Camper.
![]() Offline
Offline


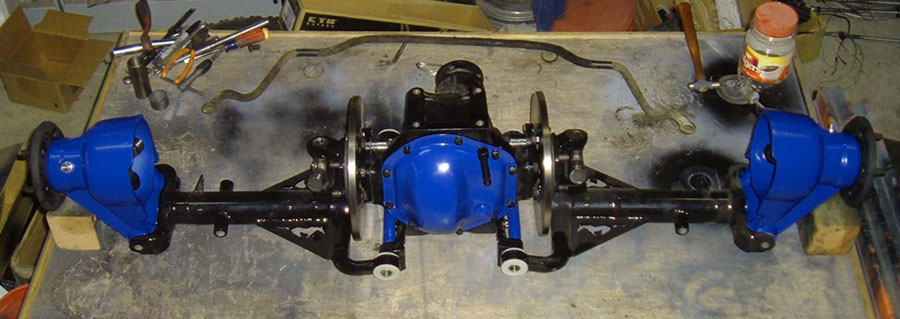
Well I have an update and some photos I just took. I got the seals and such for the inner LCA from Welsh and have them installed. I have been doing a lot of metal fabricating over the last couple of weeks as you will see. Since this is a Model A 2 door sedan it Uncle Henry supplied it with a 12 galloh tank that sat over your lap and feet...not gonna happen here!. I got a deuce deep tank that holds 16 gallons and started scratching head and on paper how to do what I wanted. I fabbed frame extensions and shimmed them as the frame was 1/2 inch narrower than the tank. Set the tank temporarily with the frame extensions tacked on. Settled the body back down where it belonged front to rear and removed a lot of rusty metal and such to make the body blend into the top of the tank. One job done. I had wanted a trailer hitch as I have a wild idea of running down the road in this hot rod sedan towing a travel trailer. Had to be class III minimum so I got the plasma out again and made what you can see. I had removed the front set of springs from the Jag IRS and after I put all this weight back on the frame, sticking out nearly 2 1/2 feet to the rear I put the front springs back on. Radius arms fabricated with a new mid cross member and you can see a second crossmember that is the rear transmission support. I also installed pinion supports to a front bracket I got from Snow White. So next step is rebuilding the calipers and the parking brakes and running lines forward. One step at a time
![]() Offline
Offline
Ahh, nothing like the look of powder coating in the morning!
Looks nice!